

Codersera


2 min to read
Install and Run TransPixar on Windows: A Step-by-Step Guide
TransPixar is a powerful image processing tool widely used in scientific and technical imaging. This guide walks you through installing, configuring, and troubleshooting TransPixar on Windows, with SEO-optimized tips for seamless operation. 🛠️ Prerequisites for TransPixar Installation Before installing TransPixar, ensure your system meets these requirements: System Requirements Component Minimum Specification Recommended Specification OS Windows 10 (64-bit) Windows 11 (64-bit)
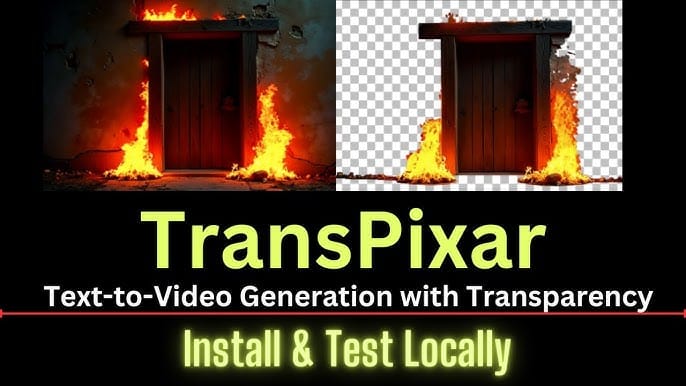
TransPixar is a powerful image processing tool widely used in scientific and technical imaging. This guide walks you through installing, configuring, and troubleshooting TransPixar on Windows, with SEO-optimized tips for seamless operation.
🛠️ Prerequisites for TransPixar Installation
Before installing TransPixar, ensure your system meets these requirements:
System Requirements
| Component | Minimum Specification | Recommended Specification |
|---|---|---|
| OS | Windows 10 (64-bit) | Windows 11 (64-bit) |
| RAM | 4 GB | 8 GB or higher |
| Storage | 1 GB free space | 2 GB free space |
| Graphics | Integrated GPU | Dedicated GPU (NVIDIA/AMD) |
Software Dependencies
- ActivePerl: Required for script execution. Download here.
- Microsoft Visual C++ Redistributable: Needed for runtime libraries. Download here.
📥 Step-by-Step Installation Guide
Step 1: Download Required Software
- ActivePerl:
- Visit the ActiveState website and download the latest version.
- Choose the appropriate version (x86 or x64) based on your system architecture.
- Microsoft Visual C++ Redistributable:
- Download the latest version from the Microsoft website.
- TransPixar Software:
- Obtain the latest version from the official TransPixar website or a trusted repository.
Step 2: Install ActivePerl
- Locate the downloaded installer.
- Double-click to launch the installation.
- Follow the on-screen instructions and select the option to add ActivePerl to the system PATH.
Step 3: Install Microsoft Visual C++ Redistributable
- Open the downloaded installer.
- Follow the prompts to complete the installation.
Step 4: Install TransPixar
- Run the TransPixar executable file.
- Follow the installation wizard, agreeing to terms and setting installation paths as necessary.
- Ensure all components are correctly configured post-installation.
Step 5: Configure Environment Variables
- Right-click on "This PC" or "My Computer" and select "Properties."
- Click on "Advanced system settings."
- In the System Properties window, select "Environment Variables."
- Under System Variables, find and edit "Path."
- Add paths for ActivePerl and other required tools.
Step 6: Verify Installation
- Open Command Prompt.
- Type
transpixar --versionand press Enter. - If installed correctly, version information or a help message will appear.
Running TransPixar
Basic Commands
- Help Command:
transpixar help - Processing Images:
transpixar process [image_file]
Example Usage
transpixar process input_image.jpg --output output_image.png
This command processes input_image.jpg and saves the output as output_image.png.
Running TransPixar: Commands and Examples
Verify Installation
transpixar --version
Expected Output: Displays the installed version (e.g., TransPixar 2.1.4).
Process an Image
transpixar process input.jpg --output output.png --mode enhance
--mode enhance: Applies image enhancement algorithms.- Supported formats: JPEG, PNG, TIFF.
Batch Processing
transpixar batch-process C:\Images\input_folder --output C:\Images\output_folder
🔧 Troubleshooting Common Issues
Issue 1: "Command Not Recognized"
- Fix: Ensure ActivePerl and TransPixar paths are correctly added to Environment Variables. Reboot your PC after changes.
Issue 2: Missing DLL Errors
Fix: Reinstall Microsoft Visual C++ Redistributable or run:
sfc /scannow
Issue 3: Slow Performance
- Close background apps.
- Update your GPU drivers (critical for image processing tasks).
💡 Pro Tips for Effective Use
- Automate Tasks: Write Perl scripts to chain TransPixar commands.
- Preserve Originals: Always use
--outputto avoid overwriting source files. - Stay Updated: Check for updates monthly via
transpixar update.
Points to Consider:
1: Can I use TransPixar on Windows 7?
- A: No. TransPixar requires Windows 10 or later due to 64-bit dependency.
2: Is TransPixar free?
- A: Yes, but advanced features may require a license.
3: How to uninstall TransPixar?
- Go to Control Panel > Programs > Uninstall a Program and remove TransPixar.
📝 Conclusion
Installing and running TransPixar on Windows enhances image processing capabilities, especially in technical fields requiring precision. By following this guide, you can efficiently set up and utilize TransPixar while addressing common issues effectively.
References
🚀 Try Codersera Free for 7 Days
Connect with top remote developers instantly. No commitment, no risk.
Tags
Trending Blogs
Discover our most popular articles and guides

10 Best Emulators Without VT and Graphics Card: A Complete Guide for Low-End PCs
Running Android emulators on low-end PCs—especially those without Virtualization Technology (VT) or a dedicated graphics card—can be a challenge. Many popular emulators rely on hardware acceleration and virtualization to deliver smooth performance.

Android Emulator Online Browser Free
The demand for Android emulation has soared as users and developers seek flexible ways to run Android apps and games without a physical device. Online Android emulators, accessible directly through a web browser.

Free iPhone Emulators Online: A Comprehensive Guide
Discover the best free iPhone emulators that work online without downloads. Test iOS apps and games directly in your browser.
10 Best Android Emulators for PC Without Virtualization Technology (VT)
Top Android emulators optimized for gaming performance. Run mobile games smoothly on PC with these powerful emulators.

Gemma 3 vs Qwen 3: In-Depth Comparison of Two Leading Open-Source LLMs
The rapid evolution of large language models (LLMs) has brought forth a new generation of open-source AI models that are more powerful, efficient, and versatile than ever.

ApkOnline: The Android Online Emulator
ApkOnline is a cloud-based Android emulator that allows users to run Android apps and APK files directly from their web browsers, eliminating the need for physical devices or complex software installations.

Best Free Online Android Emulators
Choosing the right Android emulator can transform your experience—whether you're a gamer, developer, or just want to run your favorite mobile apps on a bigger screen.
Gemma 3 vs Qwen 3: In-Depth Comparison of Two Leading Open-Source LLMs
The rapid evolution of large language models (LLMs) has brought forth a new generation of open-source AI models that are more powerful, efficient, and versatile than ever.


